Connect any tool with the Make HTTP Module


By
Jelle Engelen
on
2
-
8
-
2024
In the world of automation, Make.com is a leader, allowing you to connect various apps and services to automate work processes. While Make already supports many integrations, there are sometimes specific tools or services that aren't on the list. Make offers a flexible solution for this: the HTTP module. In this blog post, we'll look at how you can use this module to achieve unsupported integrations into your automation.
What is Make.com?
Make.com supports over 1,800 integrated (native) apps and tools. With Make, you can easily sync data, automate notifications, and optimize complex business processes.
While Make offers an impressive number of native apps, there are times when you want to work with a tool that isn't directly supported within the platform yet. This is where the strength of the HTTP module comes into play.
What is the HTTP Module?
The HTTP module in Make.com is a great option that lets you make API requests to any external service that supports a REST API. This allows you to integrate with all modern tools, even if they are not directly supported by Make.com. Whether you want to retrieve, edit, or send data, the HTTP module offers the flexibility you need.
How does the HTTP Module work?
With the HTTP module in Make.com, you can send data to an API for various purposes, such as retrieving, editing, or creating data. These requests can use various methods, including GET, POST, PUT, and DELETE, depending on the desired action.
In the example below, we'll discuss how to create a new transaction in Kiflo, a tool that doesn't natively integrate with Make, via a Post-Request where you add a body to send the necessary data.
Step 1: Select the appropriate HTTP Module
Start by selecting the right module for your scenario. In most cases, you choose “Make a request”, which allows you to send an HTTP request to an endpoint. This offers maximum flexibility.
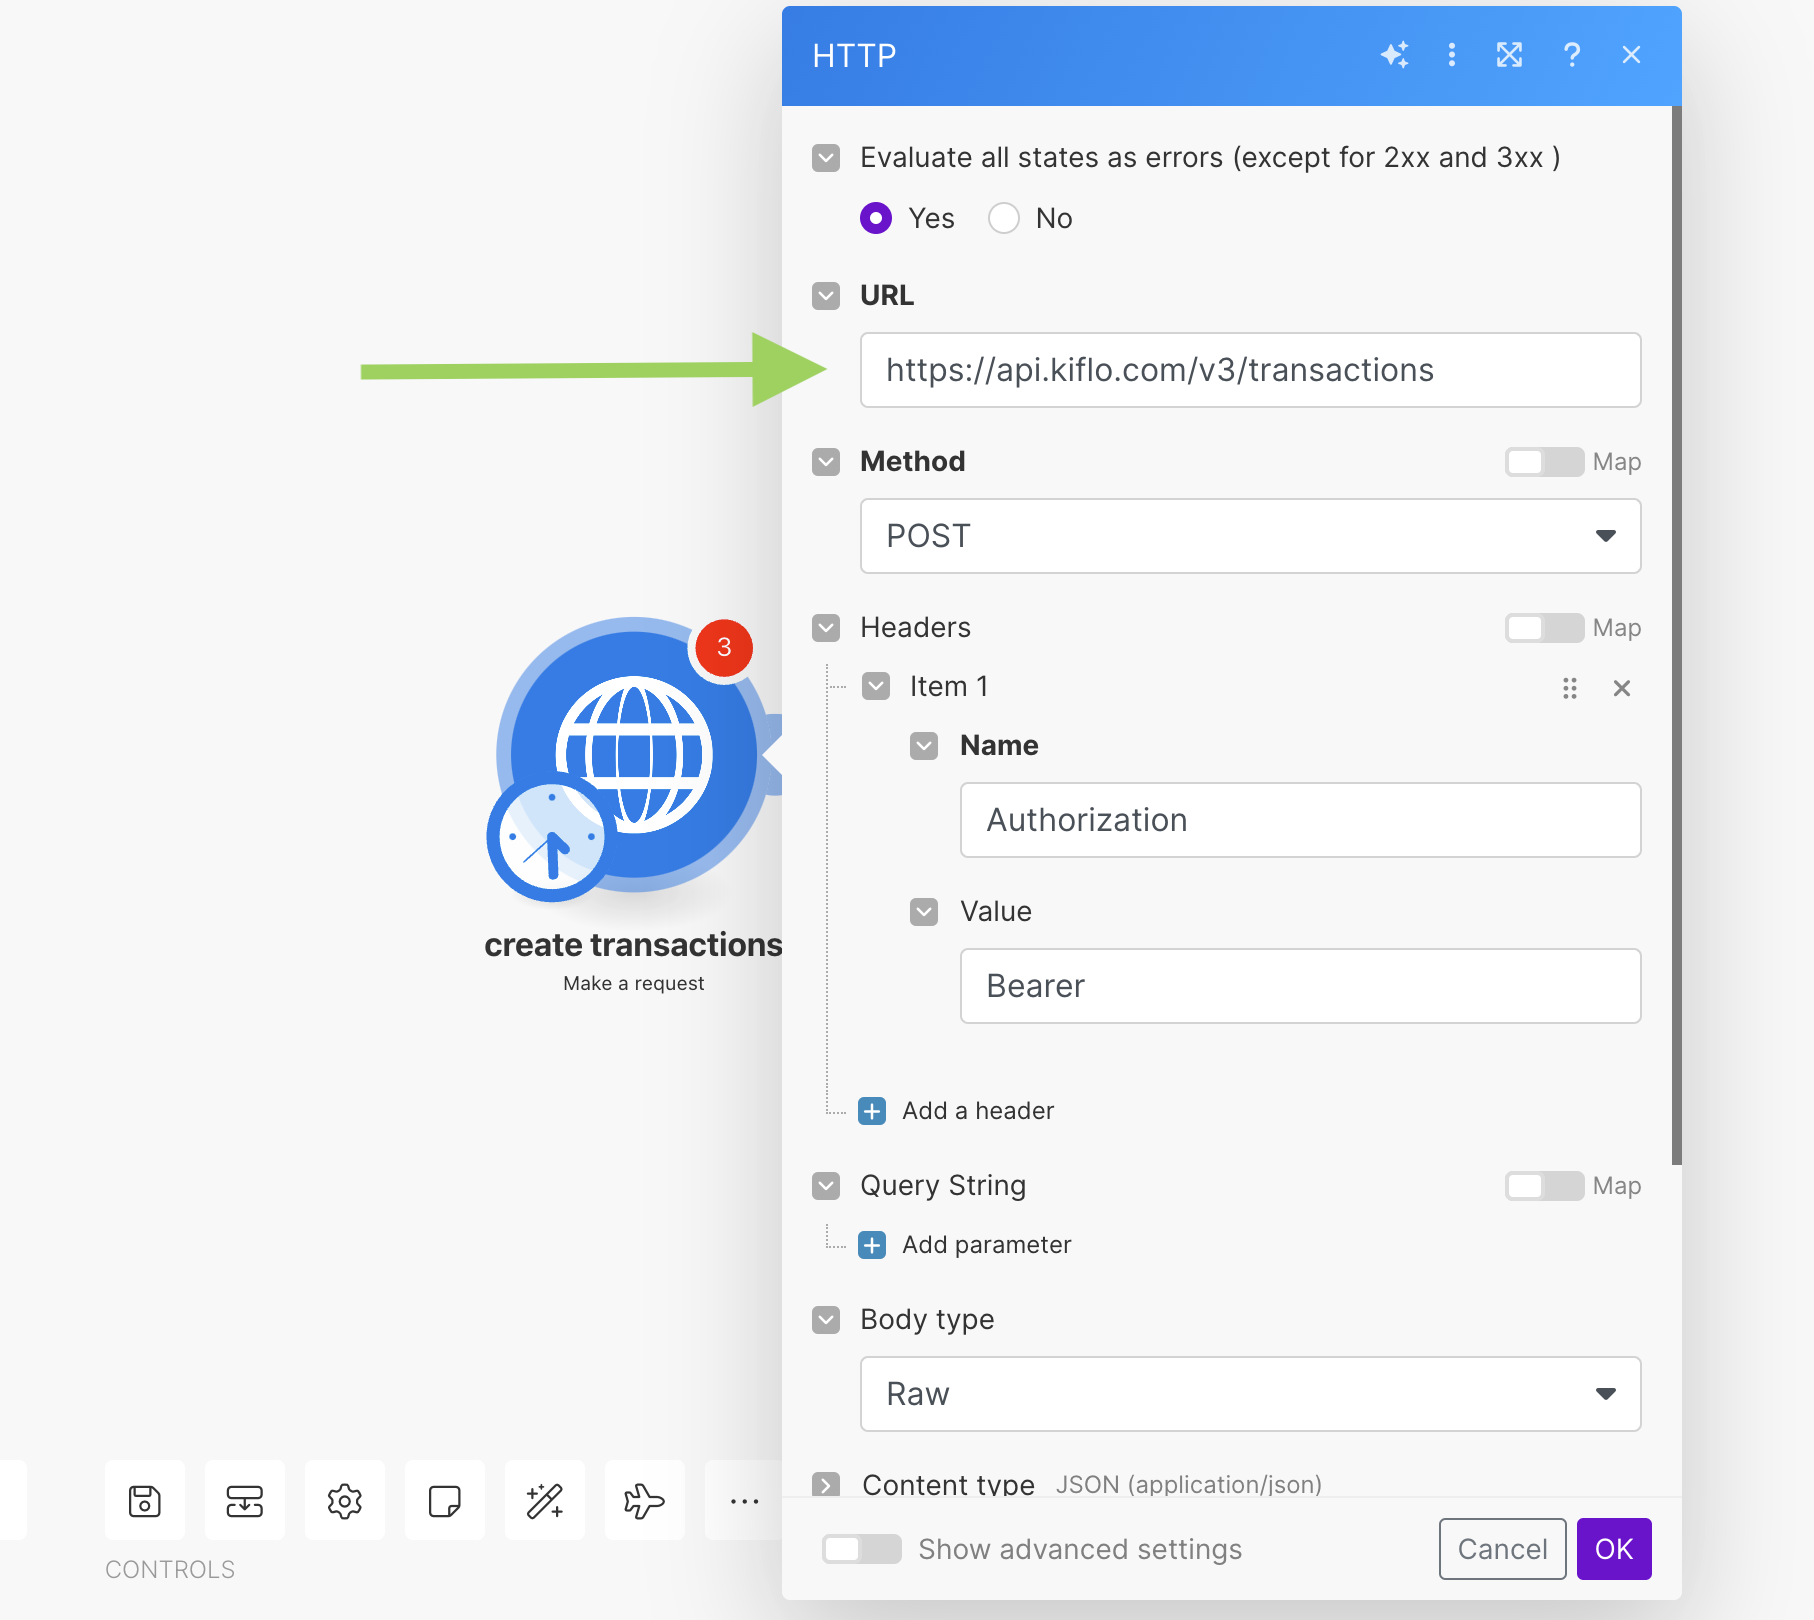
Step 2: Add the correct URL
Insert the API endpoint URL where the transaction should be created, in this case, “https://api.kiflo.com/v3/transactions”. Depending on what you want to automate, you can find the different endpoints in the tool's documentation.
Step 3: Select the correct method
Choose the POST method because it is used to add new data to the API. This information can also be found at the desired endpoint in the documentation.
Step 4: Add required headers
Add an 'Authorization' header with the value Bearer [enter API key here]. This ensures that you are authorized to add data. Sometimes more headers are needed. This can vary from tool to tool, so always read the documentation carefully.
Step 5: Add a body type
You send the desired information in the body of the request. Select “Raw” as the body type and choose “JSON (application/json)” as the content type, as in this case the data is transmitted in JSON format. Note: the size of the body depends very much on the tool you're integrating with. In most cases, you need to add a body to create and update. When retrieving or deleting information, you often do not need a body, but you put the data in the parameters of the URL.
Step 6: Add Body Content
Fill in the body with the JSON data that contains the details of the new transaction, such as transaction name, amount, currency, and related customer and partner information. Again, take a good look at the API documentation, so that you know what structure the body should have.
Practical Tips
Check API documentation
Make sure to thoroughly read the documentation for the API you want to use. This helps you understand what endpoints are available, what data you can send or receive, and what headers or authentication methods are required. Here is an example of an API documentation: Kiflo API documentation.
Test your requests
Before integrating your HTTP module into a complex scenario, test requests separately with tools such as Postman. This can help identify any issues with API settings or data formats before you use them in your automation.
Error handling
Not every API response is successful. Plan for errors by checking the HTTP status codes returned by the API and set error handling logic in your scenarios to deal with them. This can range from retrying a request to logging errors for further investigation.
Using API keys
Treat API keys as sensitive information. Store them securely and don't share them publicly. In Make.com, you can use secure variables to securely enter and use API keys.
Rate Limiting
Some APIs have limits on how many requests you can make within a given time. Review the rate limiting policies of the API you're using and plan your scenarios accordingly to prevent unexpected throttling or blocking.
Document your settings
Keep a log or documentation of the settings and configurations you used in your HTTP modules. This not only helps with future updates or changes, but also makes it easier to maintain or troubleshoot the module.
Conclusion
The HTTP module in Make.com is a great option when you want to integrate a tool that isn't natively supported. Where other automation tools are limited to integration with connected tools, the HTTP module ensures that you can set up all your automations on one platform. Although the implementation has a somewhat higher learning curve than with the native integration, we hope you'll have everything up and running quickly with this information.
Need help from a Make expert?
Get in touch and one of our MAKE specialists will take a look with you.